Taking great ride photos
A phone and/or action cam are all you need to create great photos and videos of your bike and rides with fellow Harley® fans. Read on for our top tips to get the best results.
Top-quality photos with arty blurred backgrounds and amazing effects were once the preserve of fancy cameras and high-end software. These days you can take pro photos on the go with equipment that will fit in your pocket. Let’s face it – no one wants to be travelling with lots of heavy kit on a bike tour, so we’d recommend just two gadgets: one you already have and one that may be more of an investment in the short term, but will certainly pay off in terms of results.
The first piece of kit is your mobile phone. Unless you last upgraded your phone half a decade ago, or you’re deliberately using low-tech for a specific reason, your pocket companion has a brilliant camera that can take photos fit for social media, prints or even (if you’re lucky!) HOG magazine. But you’ve got to treat it right – and yes, that includes cleaning the lens like any other camera! – to get the best results.
App awareness
The biggest mistake people make with a phone camera is to take photos in an app like Instagram, Whatsapp or Facebook. We love these platforms and of course it makes sense if you’ll be uploading your masterpieces there, but they make it more difficult to use your image for anything else. All of these apps will compress image files, which compromises the quality, so you’ll see the difference if you try to print photos, or if you want to send them to us!
Avoid the risk by taking photos using the phone’s own native camera app, then selecting the image or video to share on Instagram or elsewhere. That way, the original file remains in high resolution in your photo gallery and you can still edit it to add your desired filters and effects. When it comes to video, the same applies – if you want to take a still image from a video, then the higher the resolution the better, and your phone’s video app is always best for this. Take your shot or clip and edit it later.
Up close and personal
Another big mistake people make with a phone is using your thumb and forefinger to zoom. This also reduces the quality of the final file as all you’re doing is making the pixels larger, rather than actually zooming like a bigger camera with a lens: It’s usually best to take the shot as you see it and then crop the final image – the quality will be the same, and you may well see something interesting elsewhere in the frame! If you do need to get closer, use your feet to zoom, not your fingers!
Our next pro tip? Don’t take videos in upright/portrait mode. It may seem like the natural thing to do in the moment, but you’ll be disappointed by the results. Since the first credited “moving image” in 1878, people have been looking at video in landscape mode, not in portrait mode. Apart from the fact that it looks odd on anything but another phone screen, it also means you lose lots of interesting stuff to the left and right of the main subject you’re videoing, so you have to swing the phone around more. Turn your phone on its side to take a video (just make sure you don’t cover the mic with your hand!)
Level up (or down…)
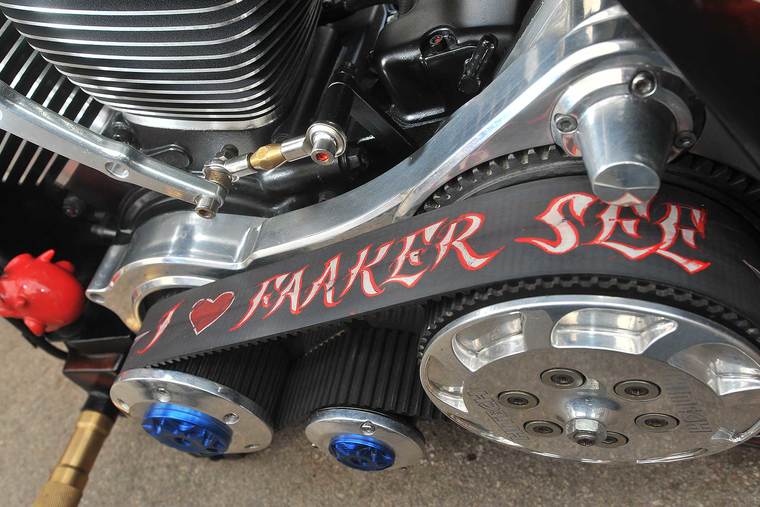
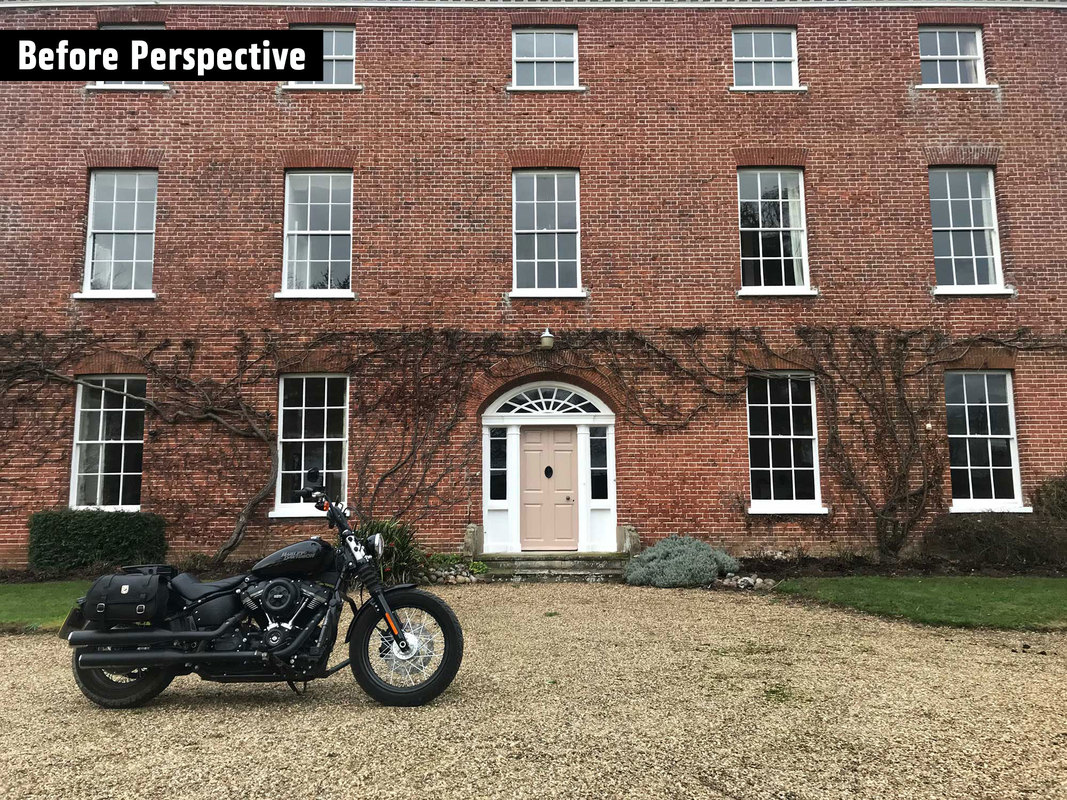
Whatever phone you are using to capture the moment, angle and subject are vitally important. Phones tend to have wide angle lenses (an iPhone camera is around the equivalent of a 30mm lens on a full frame camera – wide, but not ultra-wide) so you’ll get some distortion when you go too close to subjects. You can use this to create some interesting visual effects, but be aware that it exaggerates normal perspective.
CLICK ON THE IMAGE BELOW TO SEE A BEFORE AND AFTER PERSPECTIVE
If you want to photograph something with less distortion and more impact, consider how far you are away from your subject, and the height you’re taking the photo at. Images of motorcycles often turn out much better when they’re taken level with the tank or engine, even from a distance, so get down on one knee or just simply hold the phone at waist or knee height to capture a better shot. This is also the case for group people shots. Getting lower – to waist, chest, knee or even ground level – will create more drama, or you could try it from high by using a selfie stick. Photos taken at eye level are often a bit boring, because they represent the angle we normally see things from. Be different and mix up your angles. If you need to position your phone on the ground or on a table, leather gloves (hold your phone up between the fingers – one glove on each side) and neck tube can be very helpful props, as they allow you to make small adjustments without a tripod.
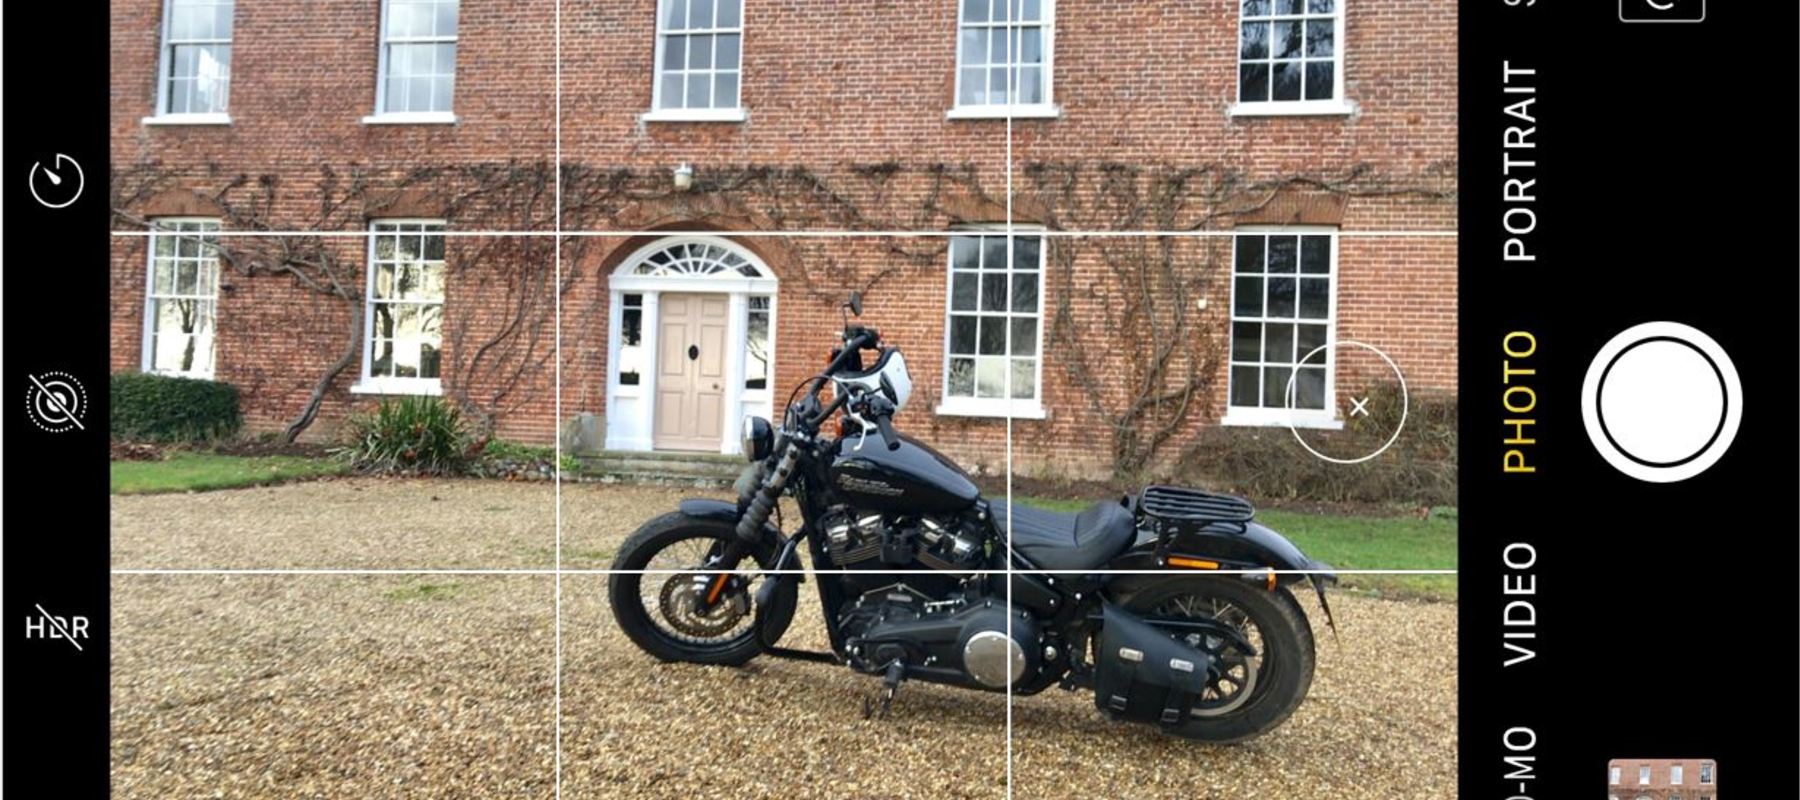
On the grid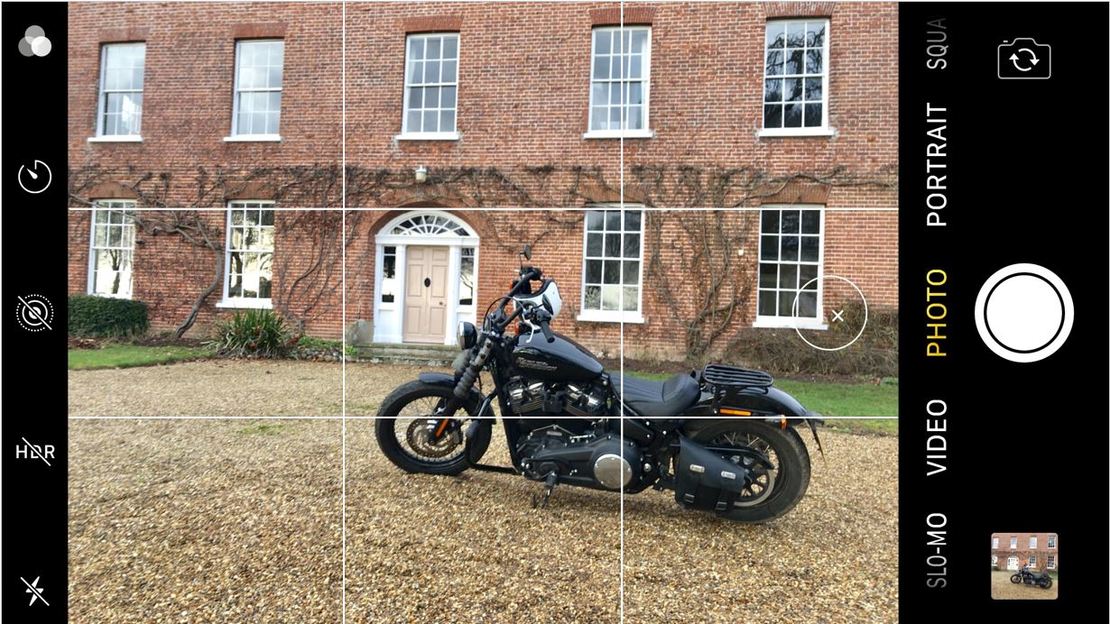
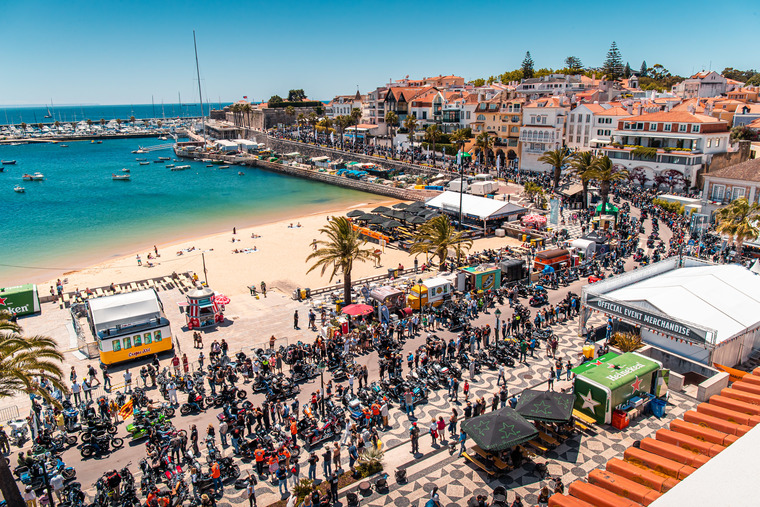
A key concept in photography is the ‘rule of thirds’. This allows you create more drama and frame the photo better by using 1/3 increments across or up the screen – effectively dividing the frame into nine separate rectangles. This setting can be activated on most phones and is a really helpful tool. Setting your bike off-centre against a background enhances both subjects. Taken on an Apple iPhone 7 Plus, you can see that the bike is framed within the four right hand, middle and bottom boxes of the grid, while the building takes up the rest. If you want to focus on the sky, make sure it appears in the top six squares of the grid. If you want to focus on the ground, put it in the bottom six. Simple, if you think about it!
Post production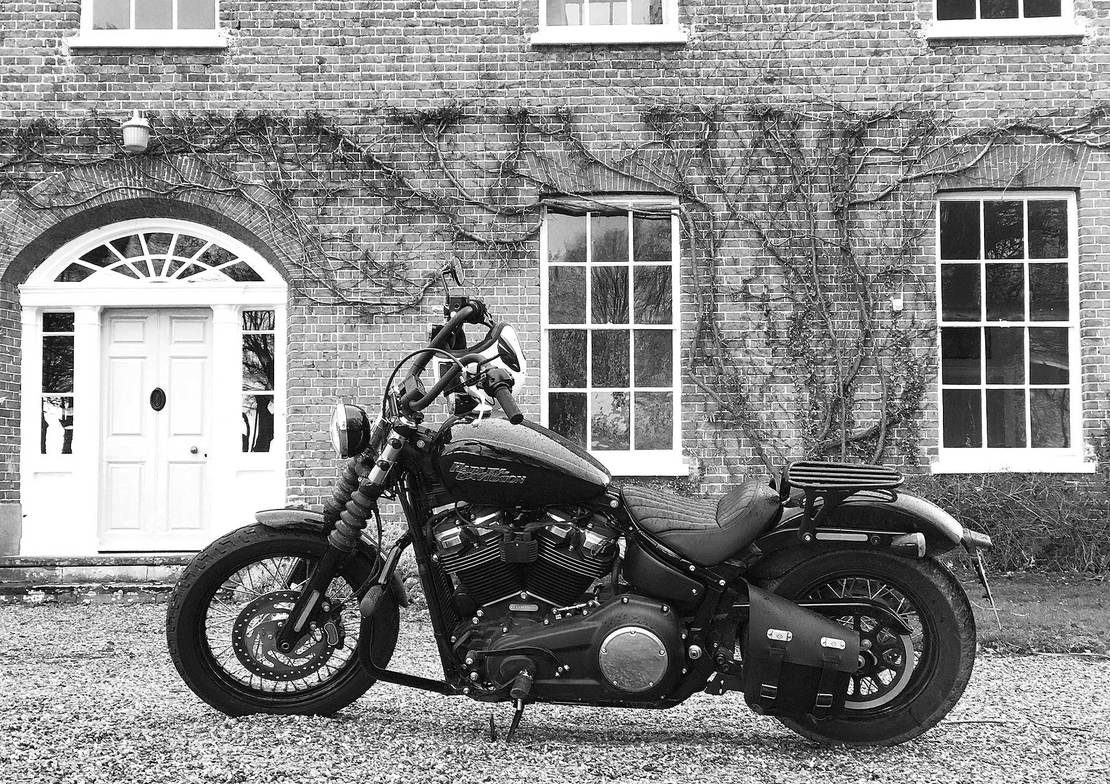
If you don’t get the shot quite perfect in the frame, or your camera/lens isn’t as big as you’d like, don’t stress – there’s still a lot that can be done after you take the shot. All modern phones let you take a photo and then open it in the default editing app to adjust brightness, resize it, change the colour, or make it black and white. Trust us: if you have a photo that you thought should have turned out great, but isn’t quite there – make it black and white, boost the contrast and it’ll be ten times better. The trick is not to take it in black and white from the outset, as this limits your options.

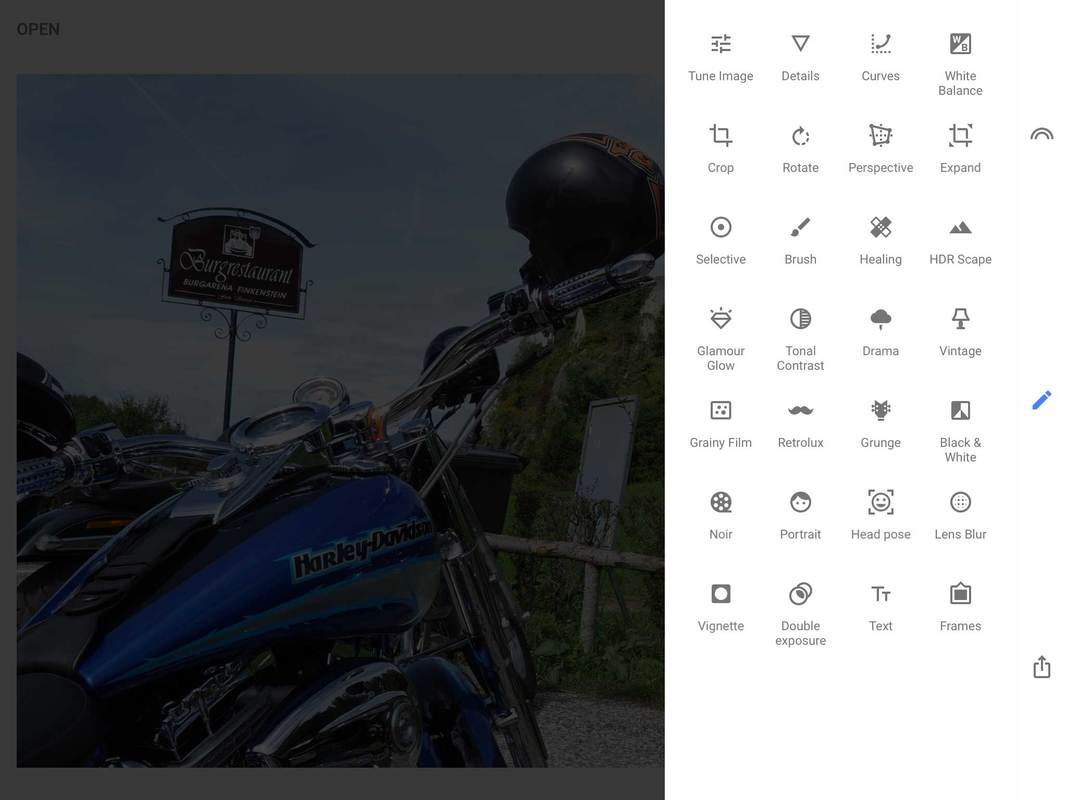
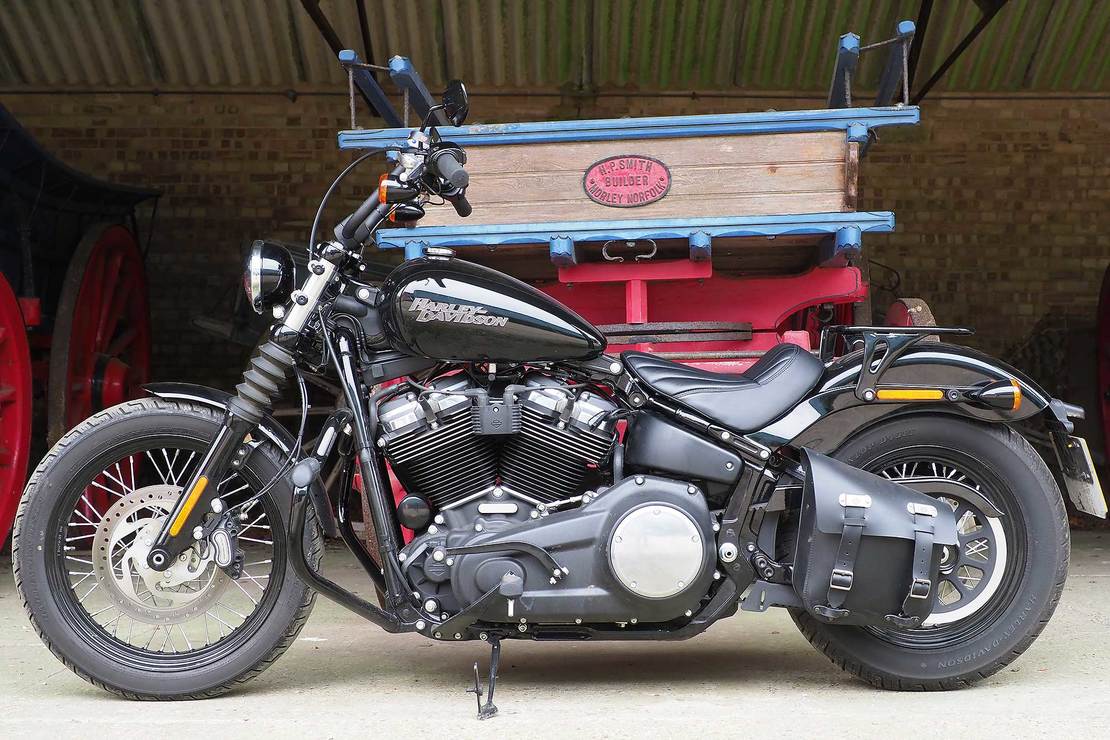
Above: The Snapseed app allows you to create subtle blurs, allowing you to focus on one part of an image. You can also pick colours to highlight a specific object.
If you want to step up your game beyond your phone’s default editing app, you could try apps like Photoshop (which is free to use in its basic mode) or one of our own favourites, Google’s Snapseed, which is again completely free on iPhone and Android. This app lets you create subtle blurs, letting you focus on the sexiest part of the image, or you can pick colours to highlight and make the rest of the image black and white, as well as adjusting brightness, contrast and adding effects like grain. It even lets you alter perspective to change an image’s angle of view. Once you’ve done your adjustments, then it’s time to upload to social media.
Our Top Phone Tips:
1. Don’t take your photos in an app like Instagram; first take with the inbuilt camera app, then upload
2. Don’t use your fingers to zoom – use your feet!
3. Use an app like Snapseed to apply extra effects
4. Crop out stuff that detracts from your subject
5. Get your angle right: go low or high to create more drama
6. Use reflections and props to create more interest
7. Don’t send photos or video via Whatsapp or text; email them at full res to avoid compression
8. Don’t take video in upright/portrait mode
9. Don’t cover the microphone
10. Clean your lens!